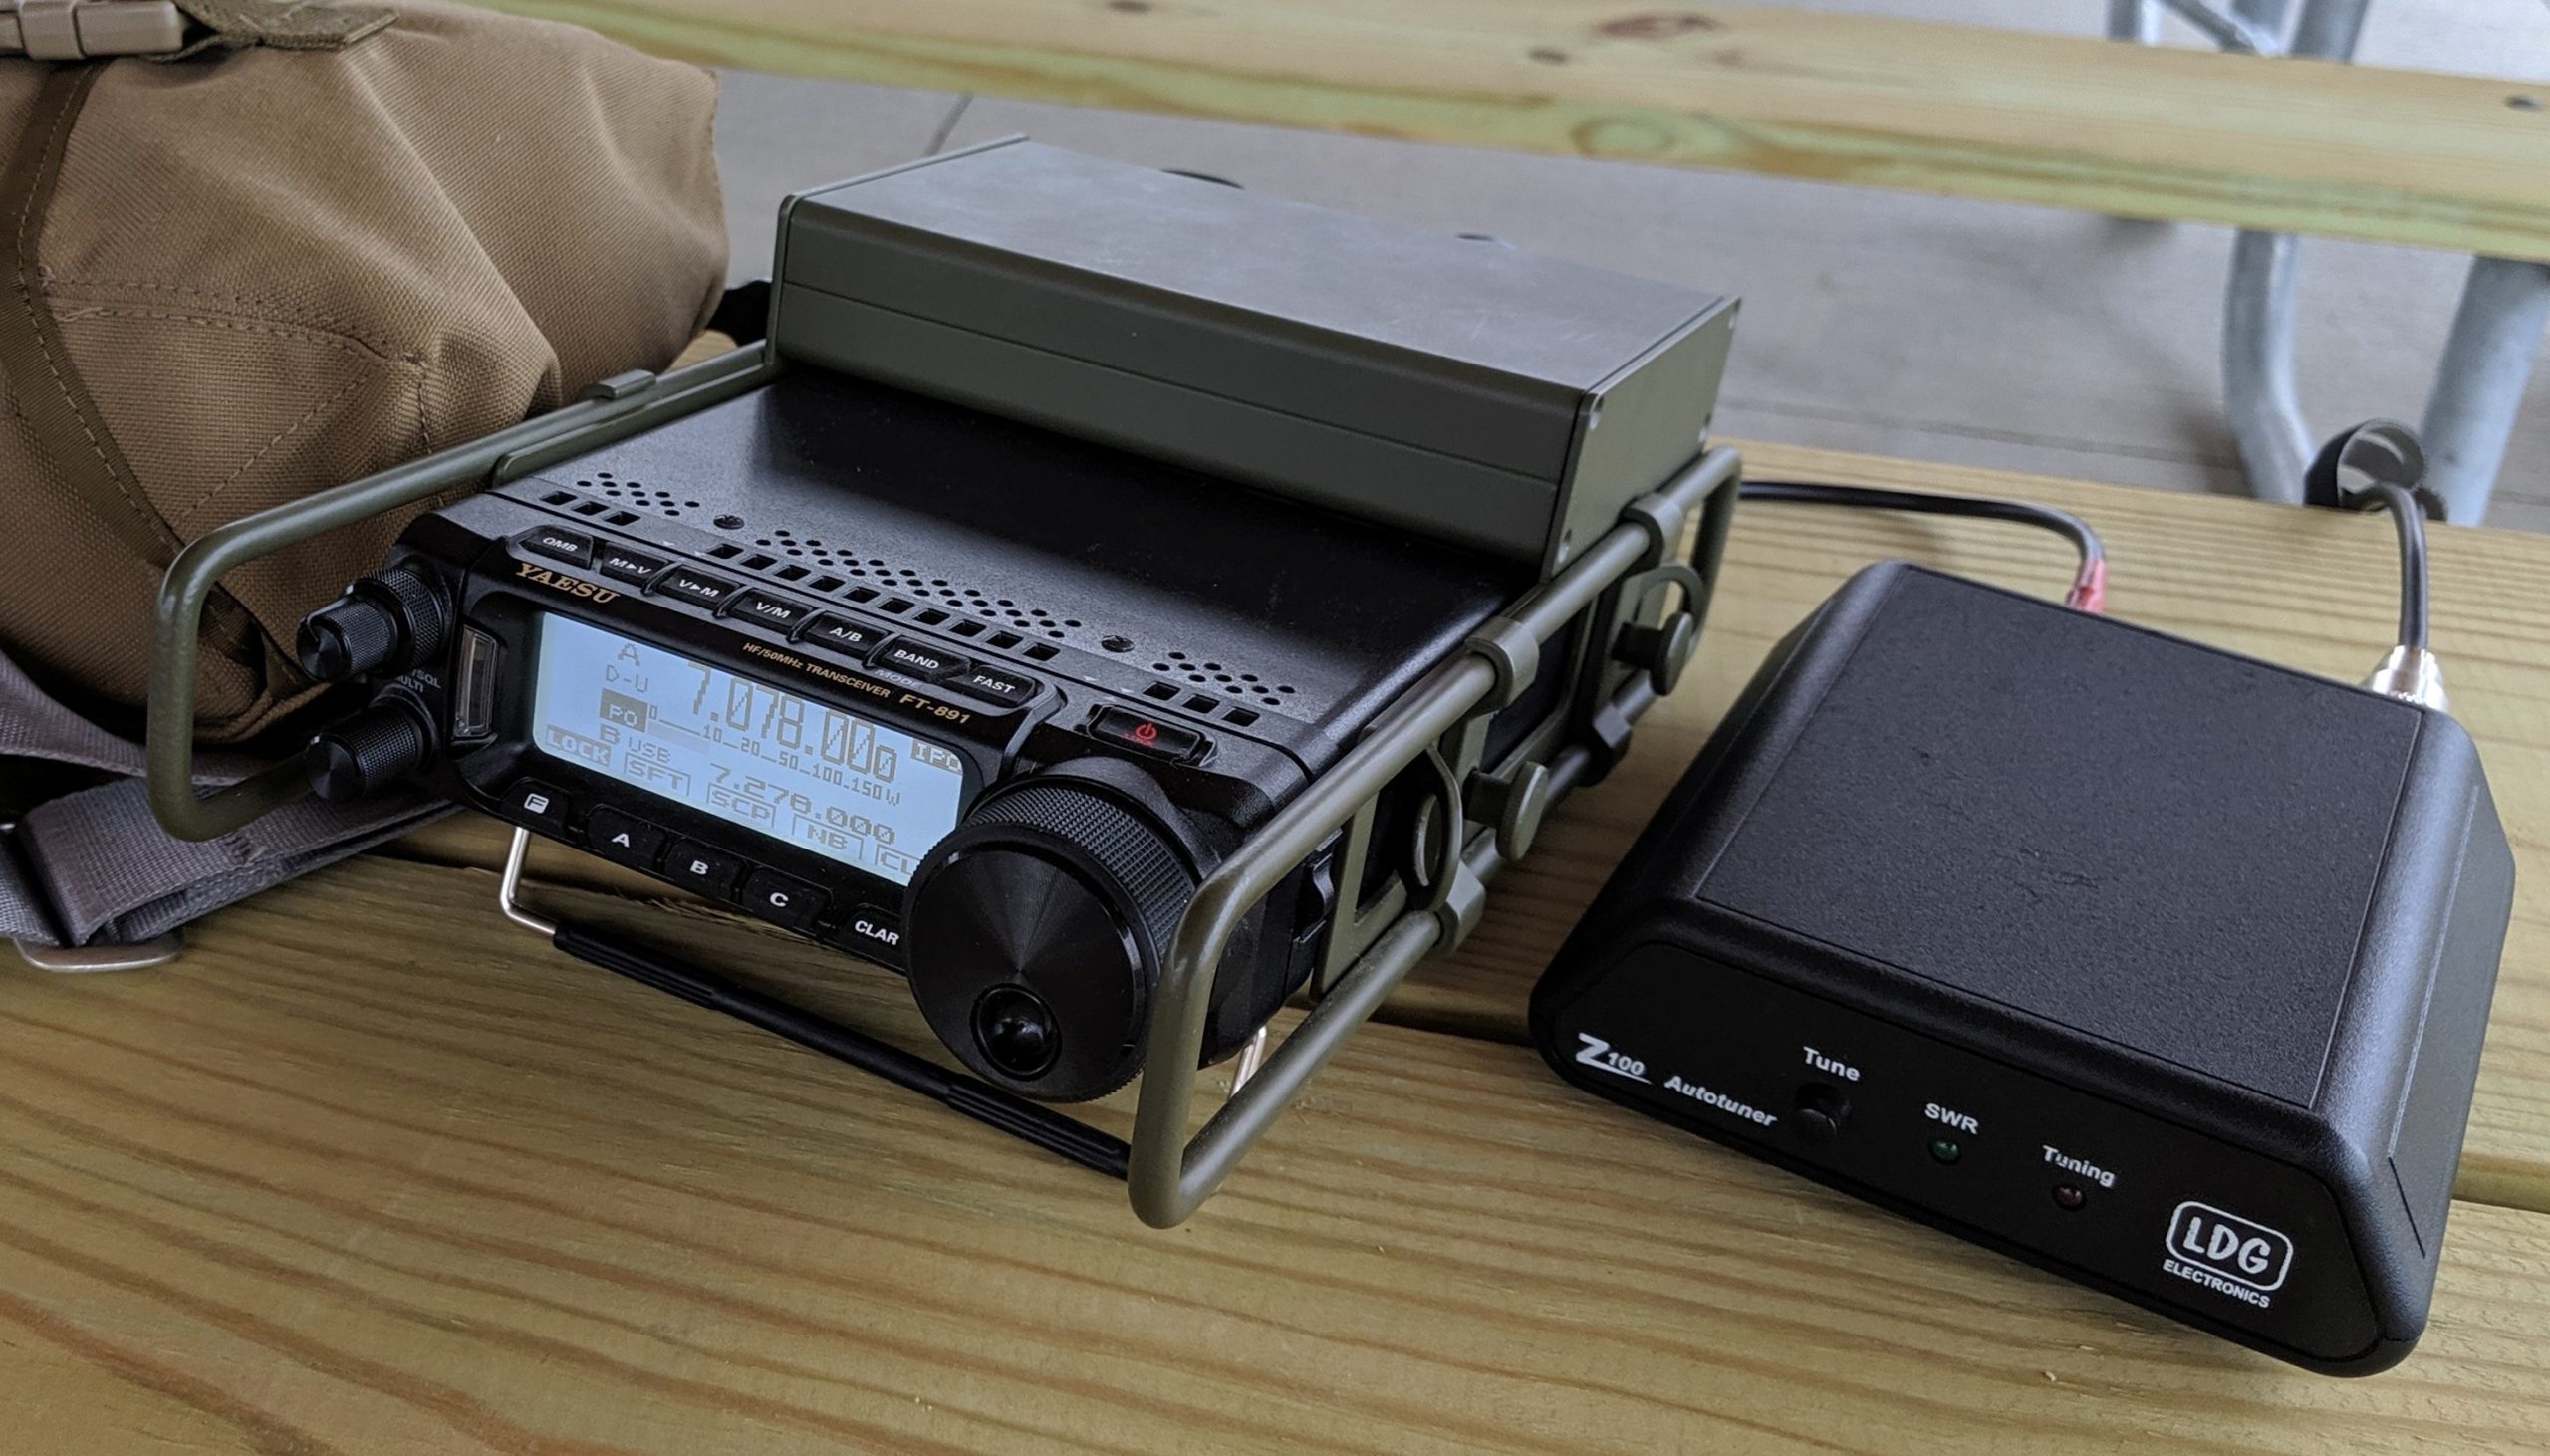
I’ve had a Portable Zero Sprint battery case for the FT857D for several years now. I never found myself using it much as I tend to stay out and operate longer than any battery that would fit inside the case would allow. Consequently it has been sitting in a closet for quite some time and I was never sure what I would do with it.
Recently though, I moved the Escort rails to an FT891 and planned to use the 891 exclusively for digital in the field, I knew that I would use a Raspberry Pi as the digital interface but had just planned to put it into a case and bungee it to the top of the radio. Then one day while looking through the shack closet I saw the Portable Zero Sprint sitting there and had the idea to turn that case into a case for the Pi. This would allow a dedicated Pi to be hard mounted to the rig full time with very short cable runs to the back of the radio, thus building something as close to an all in one “Data” radio as possible without actually putting the Pi inside. (That is in the works for my Icom 7200) This modification would eliminate the vast majority of the setup time in the field!

So I immediately got to work mounting the Pi into the case, figuring out cabling and configuring an image on the SD card to support my field operations. Currently I’m ~ 99% JS8call since much of the time it’s the only thing working during this solar low we are experiencing. Therefore my overall Pi needs are relatively simple:
- FLRig for Rig Control
- JS8call
- FLDigi
- VNC for headless operation
- GPS integration for both time and physical location
- An accurate real time clock to maintain time between power ups
- The ability to connect to wifi at home while also creating an adhoc wifi hotspot in the field
FLRig was the obvious choice for rig control of the FT-891. When I first purchased the 891, the level of integration with FLRig was quite poor. So poor in fact that I put the FT-891 on the shelf and strongly considered selling it. At this point I am VERY glad I did not do that. The current version of FLRig has excellent support for the advanced features in the 891 and is at a level to which the operating capabilities are nearly identical to that of my primary station which is the Icom 7200, a Raspi and FLRig as the controller.
The components used in this build are as follows:
- Yaesu FT-891
- Portable Zero Escort rail kit with optional Sprint battery box
- Circuit board stand off kit for mounting the Pi into the case
- Anyone who works with small boards should have one of these kits
- Standoff Kit
- A Raspberry Pi 4B with 1mb of Ram
- U-Blox GPS dongle
- 1 Six inch USB Extension Cable
- 1 Sabrent USB sound card
- The aluminum one comes with a 1′ USB extension cable, the plastic one does not. It’s slightly harder to remove the aluminum cased version but still easy with a dremel and cut off disc.
- 1 Yaesu “data” cable from Ebay
- No longer absolutely necessary, I’ll discuss this in a separate article
- 1 12 inch USB-B cable for CAT control
- This cable works for the FT-891, FT-991, Icom 7200 and Icom 7300. The Yaesu FT-8×7 series rigs will require a different cable for CAT control.
- 1 DC buck converter to supply 5v 3a to the Pi 4
- 1 5.2 x 2.1mm barrel extension cable to cut apart for wired connectors
- 1 5.5 x 2.1 mm chassis flush mount DC input
Assembly:
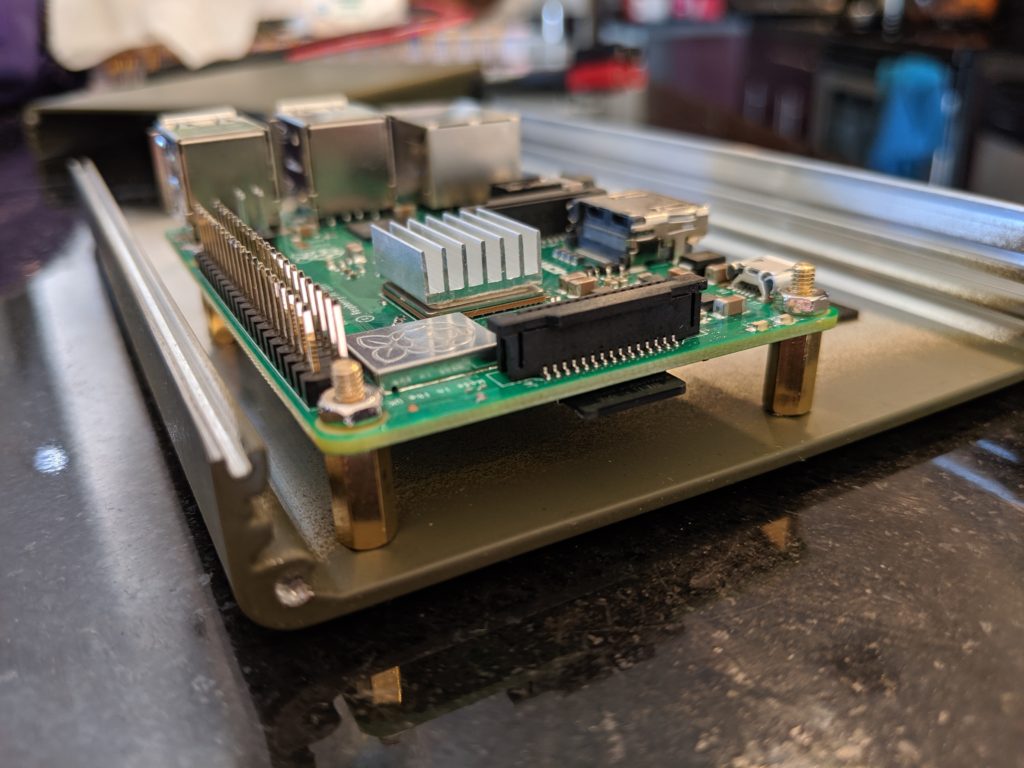
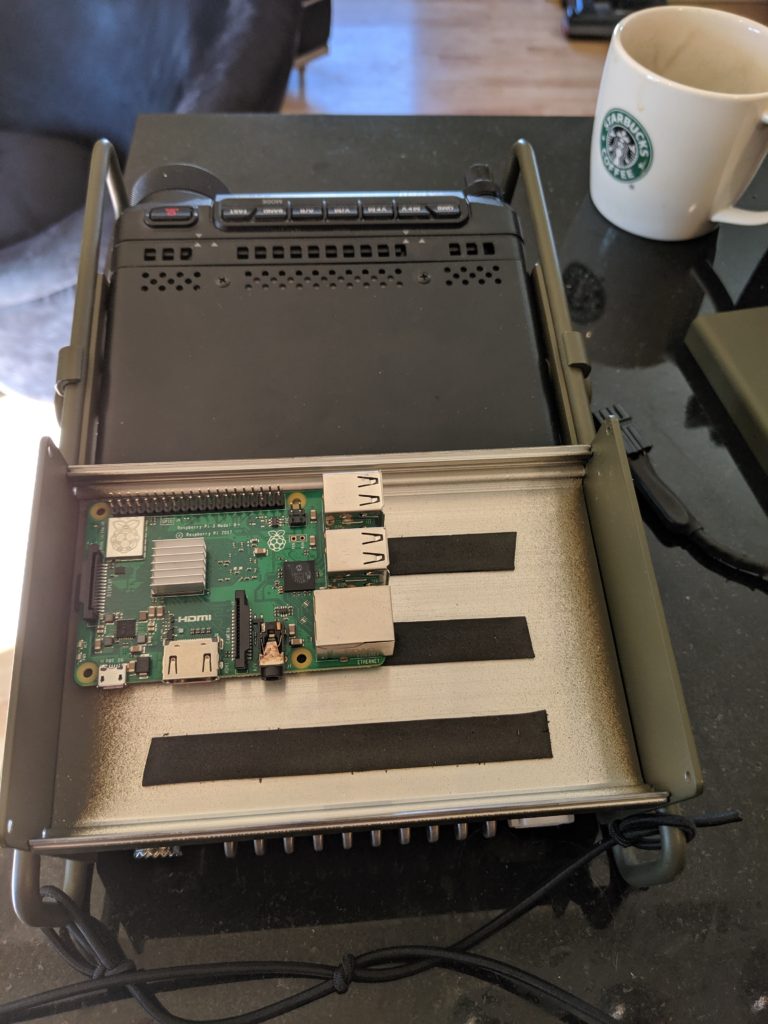
Step 1 was to determine the orientation of the Pi in the case. It was not a particularly tight fit however I did have an overall height restriction to be aware of and also had to be aware of the overall length of the Pi plus anything plugged into the USB ports. It ended up with just enough clearance for everything but not very much extra.
While I was figuring out the mounting I was also waiting for Amazon to deliver some cables. While waiting, I removed the plastic case from the Sabrent USB sound card I already had and also cut down the wires and removed the jacks from the ends of the computer to radio audio cable. Because of clearance inside the case I needed to remove the jacks and solder the wires directly to the sound card. After cutting the jacks I used my multimeter to determine which wire was connected to which portion of the TRS jack. Then I simply soldered the correct color wire to Tip, Ring and Sleeve portions of the sound card for both Mic in and Data out.
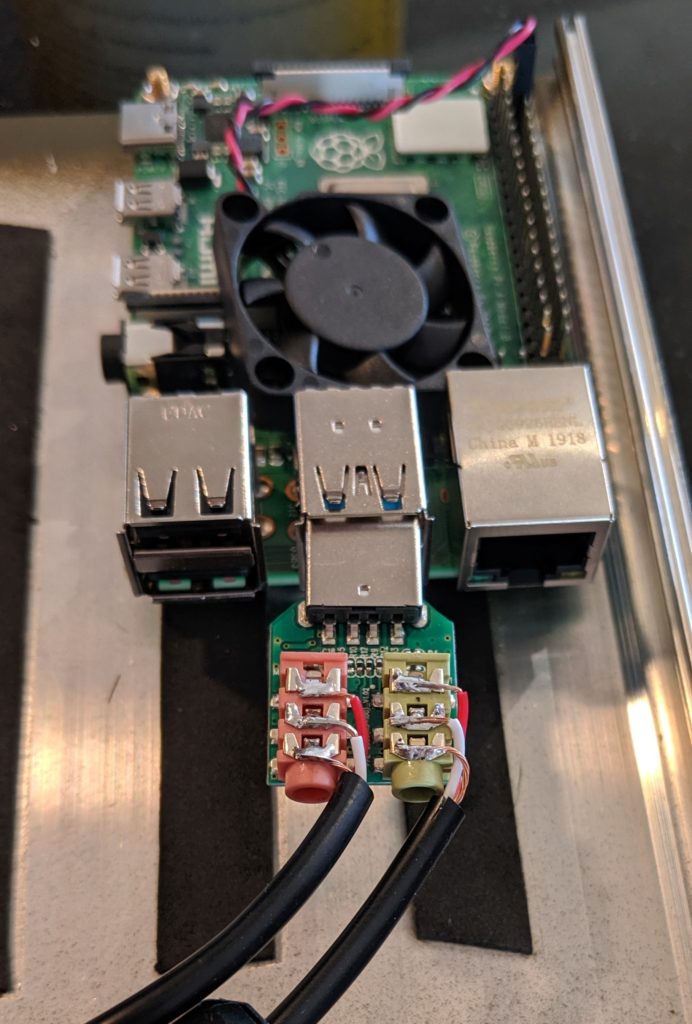
These wires come labled “data in” and “data out”. These labels are from the “perspective” of the radio so be sure to connect “data out” to the mic input of the sound card and “data in” to the audio output of the sound card. Also, be sure to re-mark your wires below your cut line prior to making the cut so you do not need to later determine which wire is data in vs data out. I used some dots of red paint to designate the wire that went to the pink (mic in) connector.
Once the cables arrived, the build went pretty quickly. I had some clamp on ferrites laying around and since everything is in such close proximity I figured they couldn’t hurt. Not sure if they were needed or not.

The part of the build that I worried about the most was drilling the large cable pass through hole on the back of the case. This is because the case splits 50/50 top to bottom so my hole had to span the seam. To solve this I marked the exact location of the hole and then removed all components from the build and double wrapped the entire case in blue masking tape. This would ensure that the two halves of the case do not slip or shift in any way while drilling. Next I found two thin boards and put the case between the boards and then dropped the entire sandwich into my bench vice. Unfortunately I did not take any photos during this process.

I drilled a very small pilot hole exactly at the center of the cable exit hole, then drilled increasingly larger pilot holes, until reaching 1/4”. At this point I switched to a step bit from Harbor Freight to finish drilling the hole to it’s final dimension of 5/8”. I wanted the hole to be a bit oversized so that the cables were not forced into an unnatural bend when passing through the case. Once the hole was drilled I very carefully smoothed and rounded the inside edges of the hole using a Dremel tool and also some fine sand paper so that there wouldn’t be any chafing or cutting of the cables when carrying the rig in a backpack.
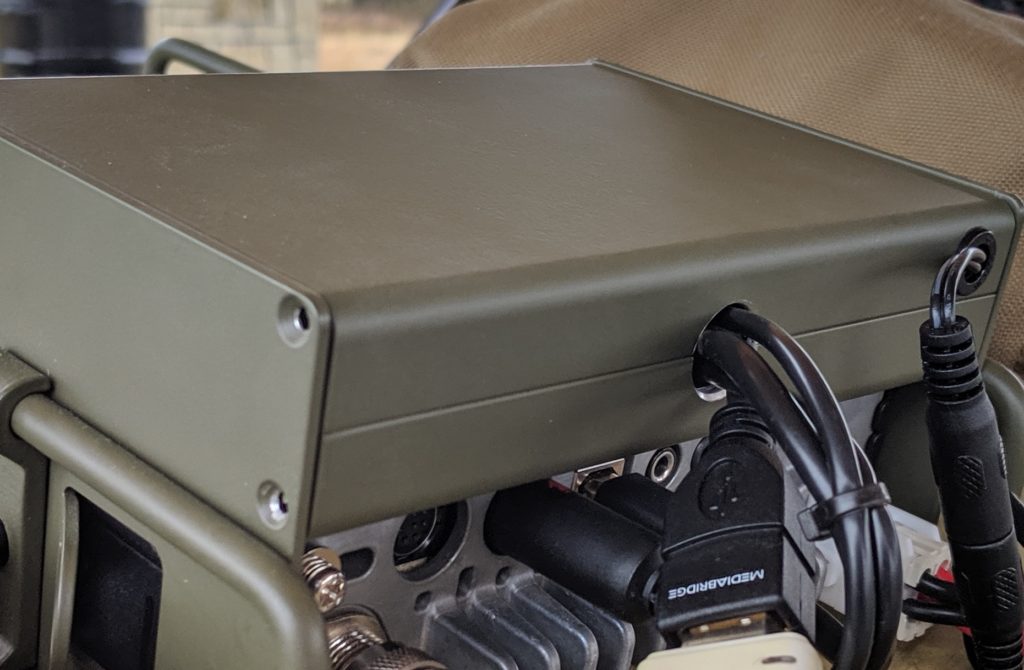
Drilling the hole across the seam allows the case to open and close easily without having to worry about feeding cables through a hole in the case.
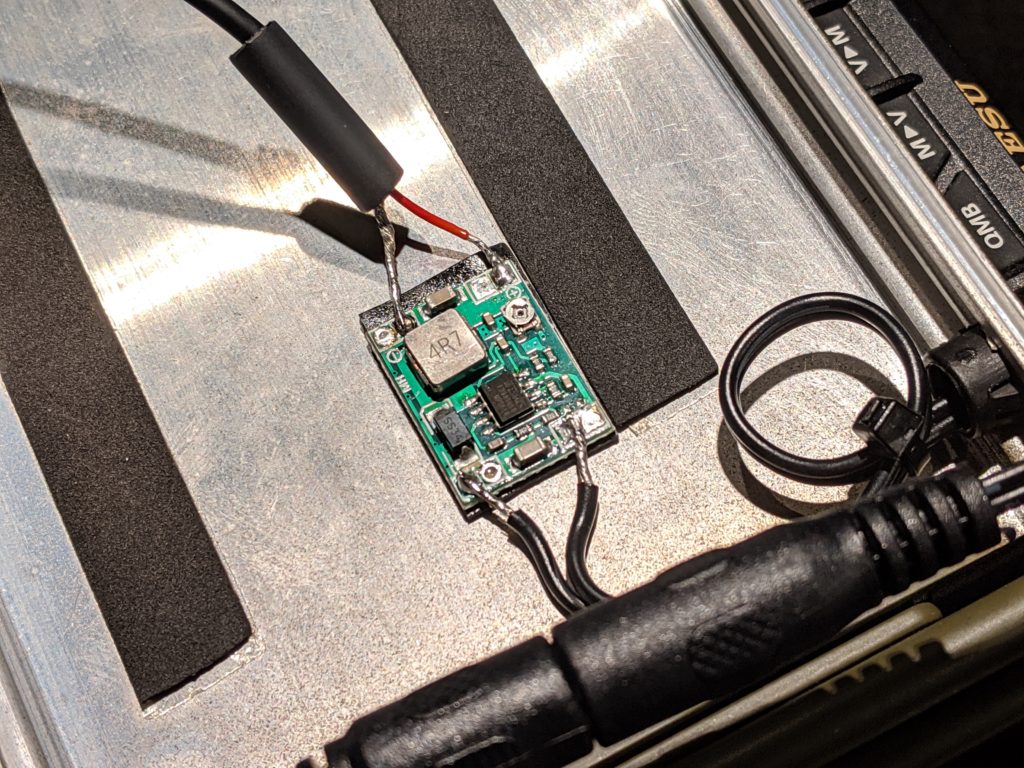
Once this was complete, I installed the DC converter on the lid using Gorilla double faced tape and soldered the 5V USB C wire to the output and the 12v DC in to the input. Be sure to connect a small 5v fan or some other load to the buck converter to adjust the voltage output prior to connecting to the Pi. Apparently attempting to adjust these converters with no load can ruin the converter and obviously connecting it to the Pi without knowing it’s output voltage is putting the Pi at risk. Another option is to buy a fixed 5v output converter or UBEC. I liked this particular one because it is RF silent and very flat. There are UBEC converters that I have successfully used in other projects however.
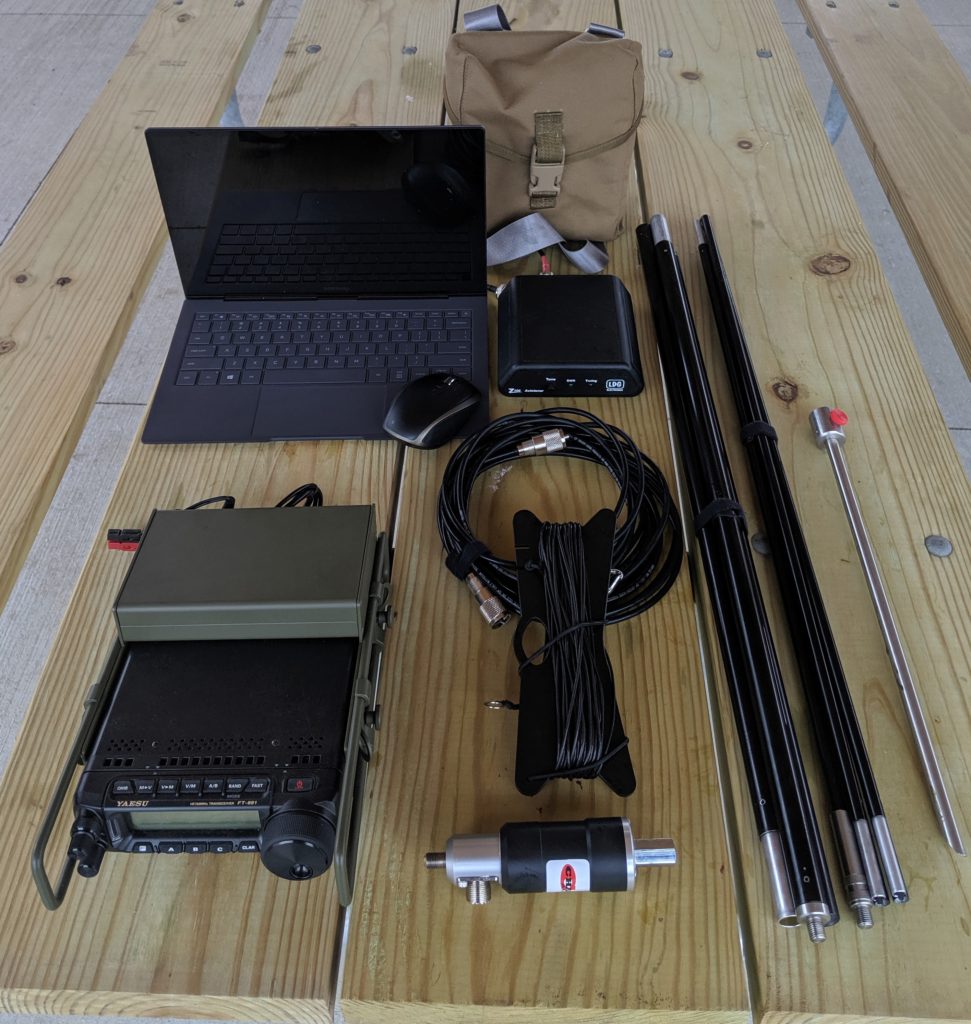
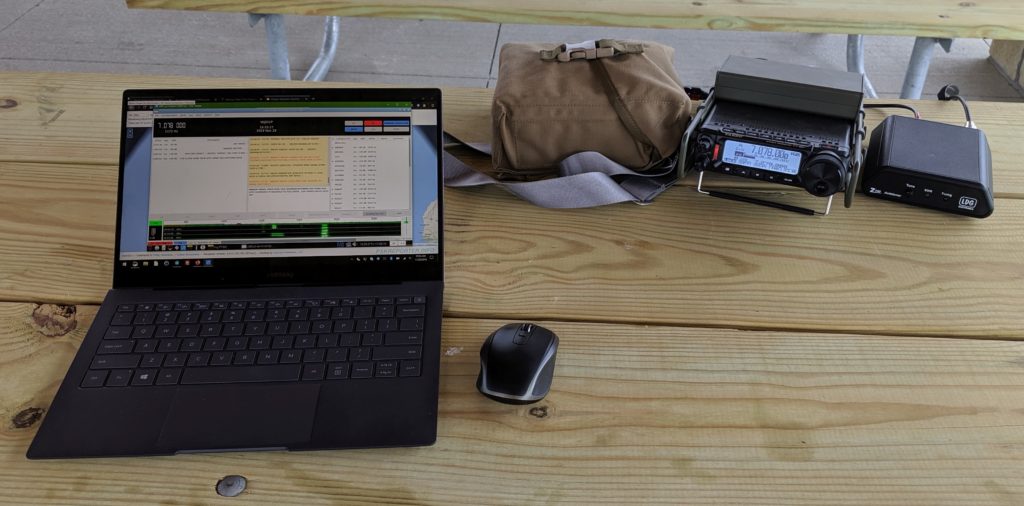
There were still a few things to do but I was anxious to get it on air. The results were excellent and the setup time from the time I got out of the car to being on air was not much over five minutes. Plugged in the radio to the battery which powered on both the radio and the computer and booted up the laptop. While all that was starting I quickly installed the Chameleon hybrid micro with mil-ext, mil whip and ground spike, connected the coax to the tuner and the tuner to the rig and I was on the air.
The real beauty of having a Pi dedicated to a specific rig is, once you get everything set up and working , it just continues to do so. There’s no configuring software, setting audio volume, etc.. just power up and go, everything is right where you left it last time.

There are still a couple of things I would like to finalize / improve on this build. I converted the 5.5 x 2.1mm power pigtail coming out of the back of the computer case to a flush mount 5.5 x 2.1mm input however the ones I purchased seem to be junk and it’s easy to bump the cable and accidentally reboot the Pi so I’ll need a better input.
Second, because of using a Pi4, passive cooling is a bit dicey. Probably fine in winter but would never work in a hot Kansas summer so it’ll be necessary to drill a grid of fan holes above the processor and mount a 40mm 12v dc Noctua fan inside the case. Noctua fans are the quietest and most durable fans available. They are not cheap Pi project fans. A Noctua fan is rated to run 24x7x365 for over seven years between failures. Once this is complete, I’d rather not have to open it up again very often.
This step MIGHT be avoidable if choosing a Pi3B+ however one of my Pi3B+ machines will also get hot inside of a relatively sealed case so it may be required even for the 3B+, not really sure.
